5s
+1
Submission successful!

October 13, 2026

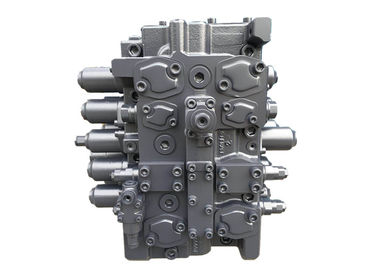
Replacing an excavator main control valve may seem straightforward: identify the faulty component, install a replacement, and get the machine back to work. In practice, however, a valve replacement can become an expensive repair if the original problem is not correctly diagnosed or the replacement is not properly matched to the machine.
For excavator repair shops, parts distributors, and equipment owners in overseas markets, these mistakes can lead to repeated repairs, hydraulic performance problems, unexpected downtime, and additional costs.
Here are five common pitfalls to avoid when replacing an excavator main control valve.
One of the most common mistakes is selecting a replacement valve because it looks similar to the original component.
Two valves may have similar housings and mounting dimensions but differ in part number, spool configuration, port arrangement, pressure settings, or hydraulic specifications. These differences can affect how the valve distributes oil to the boom, arm, bucket, travel motors, and swing motor.
Even within the same excavator model series, different production versions or hydraulic configurations may use different valve assemblies.
How to avoid this mistake
Before ordering, confirm the excavator model, serial number or production version where available, original valve part number, and hydraulic configuration. Compare the replacement valve's specifications and port layout with the original component rather than relying on photographs alone.If the original part number is unclear, provide the supplier with clear photos of the nameplate, valve body, ports, and relevant machine information. This helps reduce the risk of receiving an incompatible part.
Not every hydraulic problem is caused by the main control valve.Slow boom movement, weak digging performance, delayed response, or multiple functions operating abnormally may also result from a worn hydraulic pump, insufficient pilot pressure, incorrect pressure settings, internal leakage in a cylinder, or other hydraulic system problems.Replacing the valve without testing the system can leave the original fault unresolved. In some cases, a repair shop may replace an expensive component only to discover that the actual problem lies elsewhere.
How to avoid this mistake
Carry out basic hydraulic diagnostics before deciding to replace the valve. Depending on the symptoms and machine design, checks may include main pump pressure and flow, pilot pressure, relief valve settings, hydraulic oil condition, and cylinder leakage.
Also compare the symptoms across different functions. If several functions are weak, the pump or another shared part of the hydraulic supply system may deserve attention. If one function is affected, investigate its associated valve section, actuator, and control circuit.
These are diagnostic clues rather than definitive rules. Pressure and flow measurements, interpreted according to the manufacturer's specifications, are more reliable than symptoms alone.
A replacement valve can be damaged if contamination from the previous failure remains in the hydraulic system.When a pump or another hydraulic component fails internally, metal particles, degraded oil, or other contaminants may circulate through the system. If these contaminants are not removed, they can enter the replacement valve and damage precision-machined surfaces or interfere with spool movement.
Changing the valve alone does not necessarily eliminate the contamination that caused or accompanied the original failure.
How to avoid this mistake
Inspect the removed component and hydraulic oil for signs of metal debris, sludge, or abnormal contamination. Check the relevant filters and determine whether the reservoir, lines, cooler, or other components require cleaning according to the manufacturer's procedures and the extent of the failure.
Use hydraulic oil that meets the machine manufacturer's specifications, and replace filters when required. If the system has suffered a major internal failure, follow an appropriate flushing and contamination-control procedure rather than assuming that fresh oil alone will solve the problem.
Cleanliness is especially important when installing hydraulic components with precision internal clearances.
Correct part selection is only one part of a successful replacement. Incorrect hose connections, damaged seals, poor cleanliness during assembly, or improperly tightened fittings can introduce new problems.
Another common mistake is returning the excavator to full-load operation immediately after installation without checking for leaks, abnormal noise, or irregular movement.A valve replacement may require the hydraulic system to be filled, air to be removed where applicable, and operating pressures or control functions to be verified according to the manufacturer's service procedure.
How to avoid this mistake
Before installation, inspect the mounting surfaces, fittings, seals, and connected hoses. Keep open hydraulic ports protected from dirt and moisture, and tighten connections to the specified requirements.
After installation, follow the machine-specific commissioning procedure. Check for external leakage, abnormal noise, smooth movement, and correct operation of the relevant functions. Verify hydraulic pressures and settings where required.
Do not adjust relief valves or other pressure settings simply to make the machine feel stronger. Incorrect adjustments can create excessive pressure, overheating, or further component damage.
When a machine is down, repair shops and equipment owners often face pressure to restore operation quickly while keeping costs low. This can make the cheapest available valve seem like the most attractive option.
However, original equipment manufacturer (OEM), new aftermarket, and used dismantled valves differ in sourcing, manufacturing quality, condition, and purchasing risk.
A new aftermarket valve can offer a cost-effective alternative, but quality varies between manufacturers. A used valve may cost less, yet its internal wear, previous operating conditions, and remaining service life may be uncertain. Even an original valve must be matched to the correct machine and part number.
A low purchase price does not automatically mean a low total repair cost. Repeated removal, installation, troubleshooting, and machine downtime can quickly outweigh the initial savings.
How to avoid this mistake
Evaluate the supplier's experience, part-number accuracy, product inspection procedures, warranty terms, and ability to provide technical support. For new aftermarket products, ask about quality-control and testing procedures. For used valves, request clear information about the component's condition and any available test results.
Choose according to the machine's age, workload, repair budget, and expected remaining service life. For equipment operating under demanding conditions, reliability and the cost of potential downtime should be part of the decision.
Replacing an excavator main control valve successfully involves more than finding a replacement component. The most common problems arise when buyers overlook compatibility, misdiagnose the original fault, leave contamination in the system, rush installation, or evaluate replacement options on price alone.
Before ordering a valve, confirm the part number and machine configuration. Before installation, investigate the original failure and inspect the hydraulic system. After installation, complete the required checks and testing before returning the machine to normal operation.
For repair shops and parts buyers, a careful process can reduce unnecessary replacement costs, avoid repeat failures, and help keep excavators working reliably.
Looking for an excavator main control valve? Confirm your machine model and original part number before ordering. Providing clear component photos and application details can help your parts supplier identify a suitable replacement more accurately.